Monday, October 26, 2009

progress

well, we've made some progress on the trailer although it has been slow going. i started the fall semester and even though i only have one class it is taking up a considerable amount of time (evenings) that i would normally use to work on the trailer. why is an education that important anyway... isn't life really all about fixing up old stuff that end up being up endless money pits?? who knows. i assume someday i'll be glad i finished my degree, but right now all i want to do is have the radio on in my trailer at 11 pm while i cut in some 1/8" birch and envision the perfect trip... here are some pics of what's been done recently:

did some polising of individual components including the shasta badge, water inlet, and door catch:


installed replacement insulation where water damaged paneling had been removed:


installed replacement 1/8" birch paneling. in turns out that the original wood is ash. i found this out after i purchased the birch :(. however, i called around and couldn't find any 1/8" ash, so i kept the birch and will try to match the color with clear shellac. installing the wood was difficult and ended up not being as precise as i wanted. trim pieces will help clean up the uneven edges, etc... i used 5/8" brad nails and my brad nailer to attach the panels to the support wood:


we think we have narrowed down the flooring options. proabably going to go with the congoleum cx series vct tile. you can see a good pic of them here. in the pic below we are leaning towards the one in the bottom left hand corner. i believe it is called the white/light pebble.


i had hired an electrician to help run some new wiring off of craigslist. when i was away he cut an awful hole in the side of the trailer to put a plug. it was gruesome, all jagged and uneven. it was painful to look at and ended up being unnecessary. to cover it up i fastened a piece of aluminum over it and sealed it with puddy tape and silicone. then i put a flush mount vent cover over the aluminum. once painted i'm hoping it will look like it has an actual purpose and no one (except me) will be the wiser. wait... i just told everyone... oh well


and finally, i purchased some white upholstery welt from mesa sales to replace the welt i cut out to remove the bad wood. i had originally hoped to find some light yellow welt to match the original stuff, but after close inspection it appears the original welt was some kind of white and was then just shellaced along with the wood which gave it the yellow color. i tested my new stuff with clear shellac and sure enough it yellowed up real nice.


well that's it for now. i hope to get some sanding done on the interior soon so i can start refinishing all of the wood. here's a general list of things we have left to do before we can take it out camping:

- sand all wood and shellac
- install 1/8" sub floor cover for flooring
- install flooring
- sand and paint exterior
- update plumbing
- finish electrical upgrade
- repack bearings
- inspect axel and repair as needed
- inspect brakes and repair as needed
- sand and paint tongue and bumper
- polish and re-install window drip caps
- re-install dinette seat support wood
- re-install rear bed support wood

holy crap... that's a lot. anyone who wants to volunteer their time will be paid handsomely in dr peppers.

ttfn

paul and darcy

Friday, September 25, 2009

random shasta stuff...

here's an old photo of a trailer similar to ours. the windows are all similar to ours so this is probably around the same year. maybe its the exact same trailer???


here's an old advert for shasta. the trailer above is not likely ours since there were over 38,000 produced!


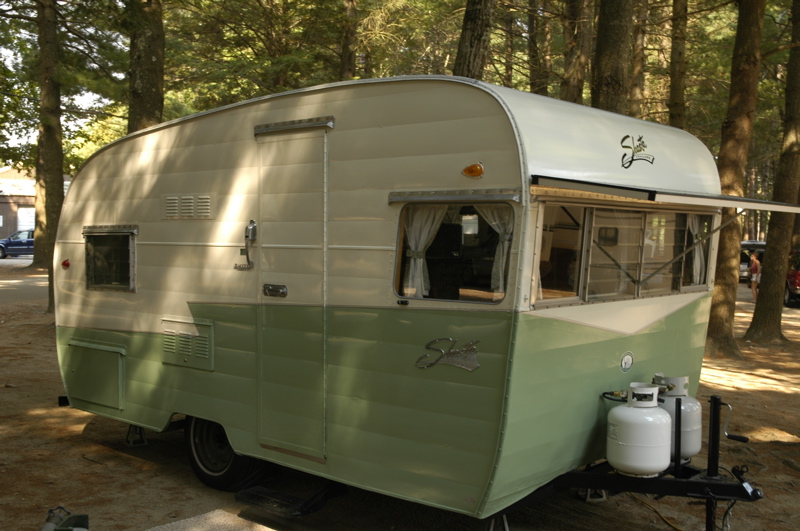
this is one of my favorite pics on the web of a restored shasta. i hope to paint ours similar to this. not sure of the color we will use on the bottom portion, but it will be a dusty green or blue probably. we don't have any wings at this point, but i'm thinking about making some out of a water resistent wood like teak. if i can manage it, i would like to make a wood window cover for the front window as well. we'll see...


i hope to add a bunk to the back of our trailer similar to this. however, i plan to make it so it can be setup at night by adding wooden dowels and two pieces of plywood and then a foam mattress. i need to come up with an idea for a bunk ledge too so the kids don't go tumbling in the night...


Friday, September 18, 2009

Update!!!

so sorry for the ridiculous delay between posts. i have been working hard on the trailer and making good progress, but have been too lazy to make regular blog posts. i promise to update this more regularly!!! lots of additional pictures to come, but here are few showing what we have been working on. thanks!


i bent up the tongue of the trailer somehow (no idea how, there is no way it was my fault or i had anything to do with it... :)), so instead of trying to bend it back i decided to get nuts with a grinder and cut it off. notice my constant companion during this whole process, the little white chair...

From Darcy and Paul's Shasta


From Darcy and Paul's Shasta


here's the result of my handiwork....

From Darcy and Paul's Shasta


From Darcy and Paul's Shasta


i then hired a welder off of craigslist to come to the house and weld on steel extension arms and a new a-frame coupler. i then added a new tongue jack. i will be painting all of this gloss black with rustoleom paint soon...

From Darcy and Paul's Shasta


i also had my new welder friend put a new bumper on (the original one had apparently taken a blow at some point in the last 50 years and was cut off with a plasma torch). he also added a 2" hitch receiver which i will use for a bike rack and/or a cargo basket. finally, he modified a spare tire carrier i got at harbor freight so i can attach it to the bumper for our spare.

From Darcy and Paul's Shasta


i've also been working on the electrical system. here is a shot of the new power converter which takes 120 volt power and converts it down to 12 volts for the light fixtures in the trailer. it also has an AC panel which powers 4 new outlets we added in various places. i plan to pick up a small flat panel tv that can be attached to the walls in several places for movie nights when we go camping and other destinations. the converter also charges a deep cycle battery that will be stored on the tongue of the trailer next to the propane tank. i may get an inverter as well so we can convert the 12 volt battery power to 120 volts to run our new mini fridge, toaster, blender, tv, etc... not sure how well that might work, but we'll see...

From Darcy and Paul's Shasta


i've been working on the areas where the birch paneling was removed due to water damage. new support wood, cleaning, removing nails, and starting to put new insulation in:

From Darcy and Paul's Shasta


From Darcy and Paul's Shasta


finally, i broke one of the front dinette windows when removing the rotted support wood so decided to replace both of them with tempered safety glass. i installed them and then replaced the shrunken original gaskets with new rubber window moulding and sealed them up with black silicone around the window facing edge.

From Darcy and Paul's Shasta


that's it for now, but we are working on the trailer tonight so i will have more pics this weekend. cutting the new birch paneling and hopefully will be putting it tonight. lots more to do, but we are having fun and learning tons...

thanks!

paul and darcy

Monday, August 3, 2009

the work begins!!!

so, now that you've seen what the trailer looked when we first brought it home, here are some pics and descriptions of the work that we have done so far....

here is the kitchen area with stove top and oven before we started work:

From Darcy and Paul's Shasta


and here it is after pulling out the stove for cleaning and the drawers for sanding and varnishing:

From Darcy and Paul's Shasta


here is the subfloor after the old tile was removed:

From Darcy and Paul's Shasta


I removed 99% of the bad wood paneling (from water damage) and some of the wood support beams. One of the beams under the front window crumbled in my hand from years of water leaks.

From Darcy and Paul's Shasta


From Darcy and Paul's Shasta


From Darcy and Paul's Shasta


here's a pic of the perfect ceiling wood:

From Darcy and Paul's Shasta


my brother in law kelsey attaching support beams under the trailer to firm up the subfloor.

From Darcy and Paul's Shasta


we've taken out almost all of the windows to be cleaned and polished. hope it doesn't rain soon!

From Darcy and Paul's Shasta


here is the one of the dinette seats with new vinyl upholstery. they turned out really nice:

From Darcy and Paul's Shasta


finally, one of the coolest things about these old shasta trailers is the magazine rack they came with. this one is in great condition and doesn't need any work:

From Darcy and Paul's Shasta

Friday, July 31, 2009

Shasta Restoration

in this blog we will document the process of restoring a 1960 shasta travel trailer. thanks for checking it out and please feel free to leave any comments you have, such as "why did you buy this piece of junk and park it in your driveway? were the home values on your street not decreasing rapidly enough??" or "tell me you didn't actually pay someone real money to haul it away from their driveway, thus increasing home values on his street, did you??" or... "that is really cool, but i'm glad it's not my project..." you get the idea. keep checking back for updates. thanks!

paul and darcy


here is a pic of the door side exterior:

From Darcy and Paul's Shasta


dinette area. seats will be covered in new vinyl and table will be cleaned up and get a new hinge, etc...:

From Darcy and Paul's Shasta


original floor will be removed and replaced with new VCT vinyl flooring that has a vintage look to it:

From Darcy and Paul's Shasta


ceiling vent with no wood rot. it appears the roof and ceiling have never leaked which is amazing since it is 49 years old:

From Darcy and Paul's Shasta